Let’s be honest — keeping a fleet of Ubuntu servers updated isn’t the most glamorous job, especially when they’re tucked away behind firewalls with no internet access. But what if we could turn this dusty chore into a clean, elegant, and even satisfying little automation adventure?
That’s exactly what we did.
This was actually my first real project using Ansible, and it turned out to be a fantastic way to get hands-on experience and discover how powerful (and fun!) Ansible can be. From generating SSH keys to automating patch checks, it became a perfect playground for learning while building something genuinely useful.
Armed with a central Ubuntu APT mirror and the magic of Ansible, we built a secure and manual-friendly patching system that makes updates feel more like pushing buttons than fighting fires. Whether you’re a sysadmin who loves control or just someone who enjoys a clean playbook, this setup is built for you.
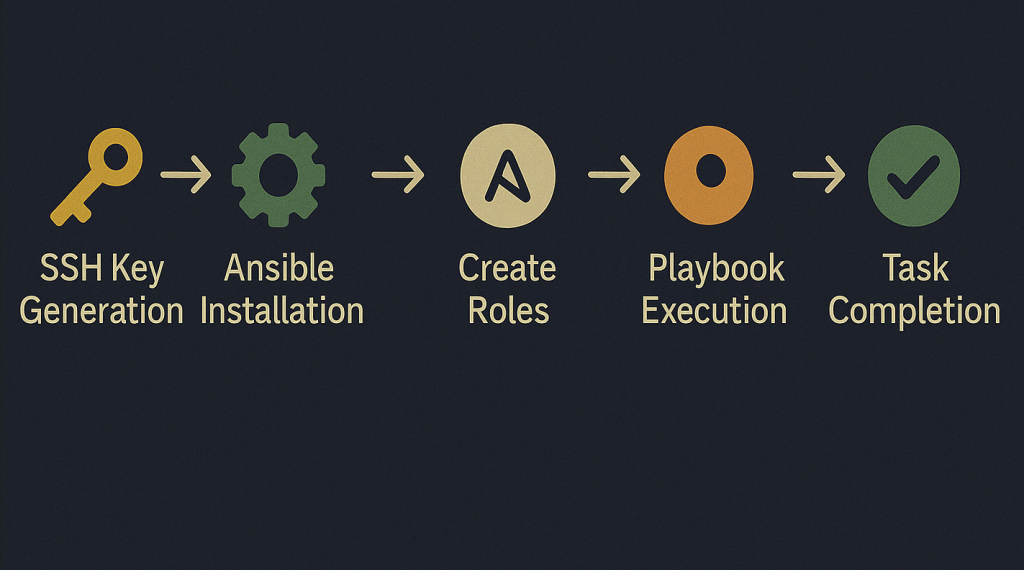
In this post, I’ll walk you through everything — from SSH keys to role-based task execution — and show you how to bring order, transparency, and even a little joy to your patching process.
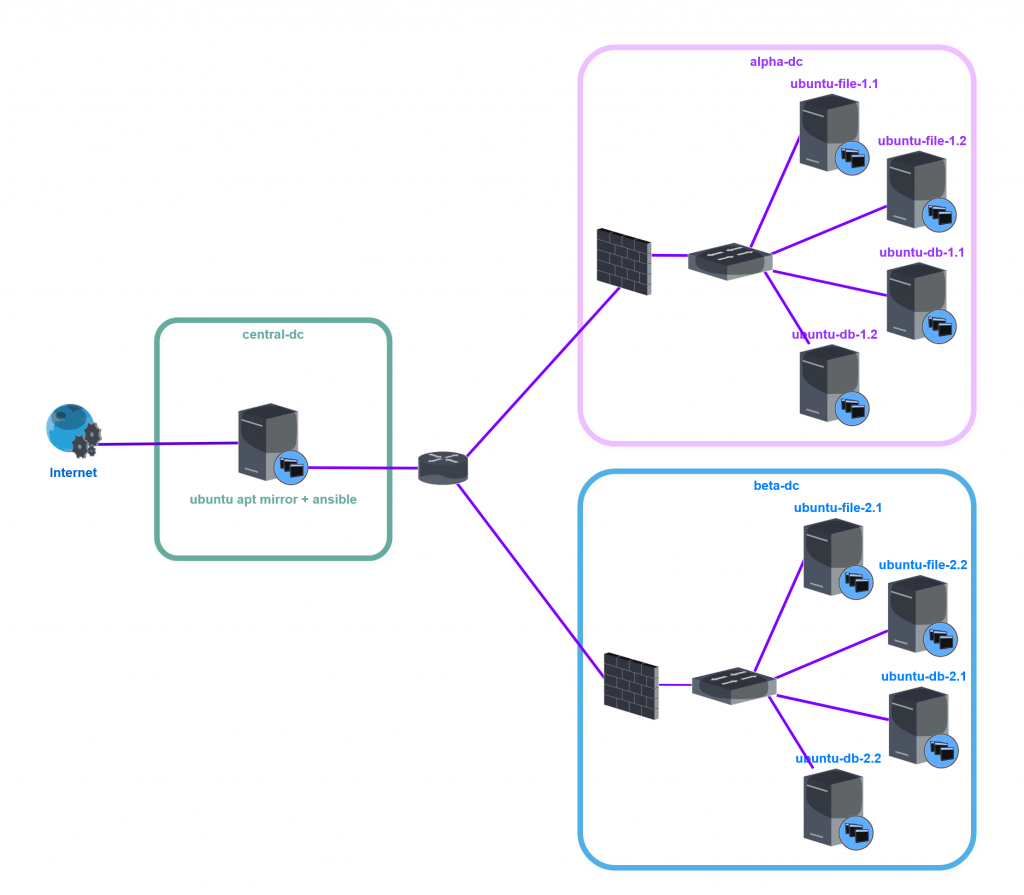
As shown in the diagram above, we have a central datacenter where our APT mirror and Ansible control node is located. From there, we securely check and manage all Ubuntu servers deployed in our Alpha and Beta datacenters.
Step One: 🔑 SSH Key Setup for Ansible Access
To allow the Ansible control node to connect to each Ubuntu client without password prompts, we first generate an SSH key pair on the node server:
#ssh-keygen -t ed25519 -C "ansible-user"Then, copy the public key to each target host (if you have more keys, specify which key to use with -i if needed). User “ansibleadmin” should be existent on each target server.
#ssh-copy-id -i ~/.ssh/id_ed25519.pub ansibleadmin@<host>This ensures passwordless login using the ansibleadmin user. We can also test this using command:
#ssh -i ~/.ssh/id_ed25519.pub ansibleadmin@<host>Step Two: 📦 Installing Ansible on the Control Node
Ansible needs to be installed only on the control machine. On an Ubuntu system, it can be installed using the system package manager:
#sudo apt update
#sudo apt install ansible -y
Once installed, you can verify the version with:
#ansible --versionNow the control node is ready to manage remote systems using Ansible.
Step Three: 📁 Ansible Directory, Inventory and Configuration Files
For our project, we started by creating a dedicated directory named security-patching under our home user folder. This became our workspace for organizing everything related to Ansible configuration and automation.
At the heart of this setup are two simple but powerful files: the inventory and the configuration. These define where your servers are, how to connect to them, and how Ansible behaves overall. Here’s what they do:
- ansible.cfg: This optional configuration file customizes Ansible’s behavior. It can set default inventory location, vault password file, privilege escalation method, SSH options, and more.
- hosts.ini: This file defines the list of managed hosts. It groups systems logically, so you can target them by zone, datacenter, or any other label. It’s essential for Ansible to know where to connect.
Ansible Configuration – ansible.cfg
Here is my ansible.cfg file that also include comments for every config line.
[defaults]
# Path to the inventory file
inventory = hosts.ini
# Default SSH user to connect as
remote_user = ansibleadmin
# Private key used for authentication
private_key_file = ~/.ssh/id_ed25519
# File that stores the Ansible Vault password
vault_password_file = .vault_pass.txt
# Where Ansible looks for roles
roles_path = roles
# Where to log Ansible output
log_path = logs/ansible.log
# Auto-select Python interpreter on target hosts
interpreter_python = auto_silent
Ansible Inventory – hosts.ini
We organized our hosts into logical groups based on datacenter zones. Here’s the file:
[alpha-dc]
ubuntu-file-1.1 ansible_host=192.168.10.101
ubuntu-file-1.2 ansible_host=192.168.10.102
ubuntu-db-1.1   ansible_host=192.168.10.103
ubuntu-db-1.2   ansible_host=192.168.10.104

[beta-dc]
ubuntu-file-2.1 ansible_host=192.168.20.101
ubuntu-file-2.2 ansible_host=192.168.20.102
ubuntu-db-2.1   ansible_host=192.168.20.103
ubuntu-db-2.2   ansible_host=192.168.20.104

[ubuntu_servers:children]
alpha-dc
beta-dc
This structure lets us run tasks per group, per environment, or across all Ubuntu servers using --limit.
Step Four: 🧪 First Test – The Ping Module
We verified SSH connectivity using Ansible’s ping module:
#ansible -i hosts.ini ubuntu_servers -m pingEach host should return pong, confirming Ansible can connect over SSH.
Step Five: 🔐 Using sudo and Vault for Elevated Commands
When testing modules that require sudo (like apt), we initially hit the sudo password prompt. To avoid re-entering the password each time, we encrypted per-host sudo passwords using Ansible Vault.
Here’s how we generated the encrypted files (Please write it down and keep your vault password safe):
#ansible-vault create host_vars/<hostname>/vault.ymlInside each file:
ansible_become_password: "your_sudo_password"To simplify this process, we used a Bash script (generate-vaults.sh) to create vaults for all hosts at once.
Step Six: 🛠️ Creating Roles and Tasks
After identifying the core actions we needed — checking and installing updates, handling reboots, and more — we created a set of dedicated Ansible tasks to automate them. We structured the Ansible project into reusable roles. Each update scenario is handled by a separate task file.
roles/patching/tasks/
├── check_security.yml       # dry-run security updates
├── check_full.yml           # dry-run full updates
├── upgrade_security.yml     # install security updates
├── upgrade_full.yml         # full system upgrade
├── check_reboot.yml         # check if reboot needed
├── reboot_if_needed.yml     # reboot only if required
Our main playbook file (security-updates.yml) includes all of these and uses tags to selectively run what we need. Here a short preview :
---
- name: Run Ubuntu update operations
  hosts: ubuntu_servers
  become: yes
  tasks:
    - name: Include security dry-run task
      include_tasks: ../roles/patching/tasks/check_security.yml
      tags: check_security

    - name: Include full upgrade dry-run task
      include_tasks: ../roles/patching/tasks/check_full.yml
      tags: check_full
👉 Full playbook and task files available here: 🔗 GitHub Repo: security-patching
Step Seven: 📁 Project Directory Structure
Now that we created all the files, here’s a simplified look at our Ansible project layout:
security-patching/
├── ansible.cfg
├── hosts.ini
├── playbooks/
│   └── security-updates.yml
├── roles/
│   └── patching/
│       └── tasks/
│           ├── check_security.yml
│           ├── check_full.yml
│           ├── upgrade_security.yml
│           ├── upgrade_full.yml
│           ├── check_reboot.yml
│           └── reboot_if_needed.yml
├── host_vars/
│   └── <hostname>/
│       └── vault.yml
└── .vault_pass.txt
This structure keeps everything modular, readable, and scalable — making it easy to maintain as your environment grows.
Step Eight: ▶️ Test Application – Running Commands
Our playbook is structured to be executed with specific tasks in mind. Running it without specifying tasks doesn’t align with its intended use and may not yield meaningful results. By focusing on particular tasks, we ensure that each execution is purposeful and targets the desired operations.
With that in mind, Ansible provides flexibility to target specific groups within your inventory, allowing for precise control over task execution. For instance, you can run a particular task on a specific group by using the --limit flag in conjunction with tags:
ansible-playbook -i hosts.ini playbooks/security-updates.yml --tags check_security --limit alpha-dc --vault-password-file .vault_pass.txtThis command will execute the tasks tagged with check_security only on the hosts within the alpha-dc group. Such granularity is invaluable when managing diverse environments with varying requirements
If you’re not comfortable storing your vault password in a file, you can prompt for it interactively:
ansible-playbook -i hosts.ini playbooks/security-updates.yml --tags check_security --limit zone_alpha --ask-vault-passBefore we wrap up, it’s worth noting that this project was just a small experiment I used to get started with Ansible. It’s a basic example that lays the groundwork for more complex automation tasks. There’s ample room to enhance this setup with additional functions and features as your familiarity with Ansible grows.
Conclusion
This setup allowed us to bring secure automation to isolated environments — where visibility and control matter more than ever. Whether you’re maintaining a handful of machines or managing a growing infrastructure, this framework gives you the power to patch confidently and intentionally — no surprises, no stress.
If you’d like to explore or reuse the actual playbooks, roles, and helper scripts we used, you can find the complete project on GitHub:
👉 Full playbook and task files available here: 🔗 GitHub Repo: security-patching
Thanks for following along — and happy patching! ⚙️🚀
And hey — patching doesn’t always have to feel like a chore. With a bit of YAML magic and the right setup, it can actually be… dare we say… fun? 😄
💬 If you found this post helpful, here’s one more tip:
Protect your browsing like you protect your data. I use NordVPN and genuinely recommend it.
Get 73% off NordVPN’s 2-year plan + 3 extra months // From €11.59 €3.09/month

This post contains affiliate links. If you buy something through one of them, I may earn a small commission at no extra cost to you. Thanks for the support!