Accidentally deleting a datastore in a VMware ESXi environment can feel like a catastrophic event, especially when the datastore is shared across multiple hosts. In this article, we’ll discuss the step-by-step process of recovering a deleted datastore, specifically when it was removed from one ESXi host and subsequently disappeared from all associated hosts. The goal is to help you understand the available recovery options and ensure data is restored with minimal downtime.
Understanding the Problem: Unmounting and Deleting a Shared Datastore
In VMware ESXi environments, datastores are shared across multiple hosts, and managing them requires caution. One common operation is unmounting a datastore from a host, which can only be done if there are no virtual machines (VMs) registered on that datastore. To unmount the datastore, any VMs must either be migrated or removed from the inventory/unregistered.
When it comes to deleting a datastore, VMware imposes a different set of requirements. We would like to present here a very specific case, namely when operating with Host-Client directly on ESXi, and not with vSphere Client. In this case, in some conditions, deleting a datastore from one host can delete it also from the hosts sharing the datastore.
The conditions to delete the datastore are: no VMs are present/registered on the host initiating the deletion, and there are no active (running) VMs on any other hosts sharing the datastore. If VMs are still running on other hosts connected to the datastore, deletion will be blocked to prevent disruption.
However, if no VMs are active on other hosts, and the initiating host has no VMs registered on the datastore, accidental deletion can occur, causing the datastore to be removed from all associated hosts.
In such situations, the first step in recovery is to assess whether the underlying storage (LUN, volume, or NFS) is still intact and to begin the restoration process.
The first step in any recovery is to assess the extent of the deletion:
- Was the datastore completely removed from the storage array?
- Is the underlying LUN or storage volume still intact?
- Is there any backup of the datastore, either within VMware or from a third-party backup tool?
Step 1: Stop and Assess the Situation
Before proceeding, ensure that no additional changes are made to the storage array or LUN associated with the deleted datastore. Avoid re-creating the VMFS datastore from the vSphere interface again or writing new data to the affected disks to prevent overwriting any potential recovery points.
- Identify the Deleted Datastore: Check the logs or interface to identify which datastore was deleted, its size, and its underlying storage location (LUN, volume, or shared NFS).
- Check for Snapshots or Backups: Confirm whether a snapshot or backup is available for the datastore.
Step 2: Check the Storage Device on ESXi Hosts
In some cases, the datastore may not be completely deleted but rather disconnected from the ESXi hosts. Here’s how to check your storage to see if the datastore is still present:
- Check Storage Adapters:
- Log in to the vSphere Client.
- Select the affected ESXi host.
- Go to Configure > Storage > Storage Devices.
- Select the device deleted and get its Location.
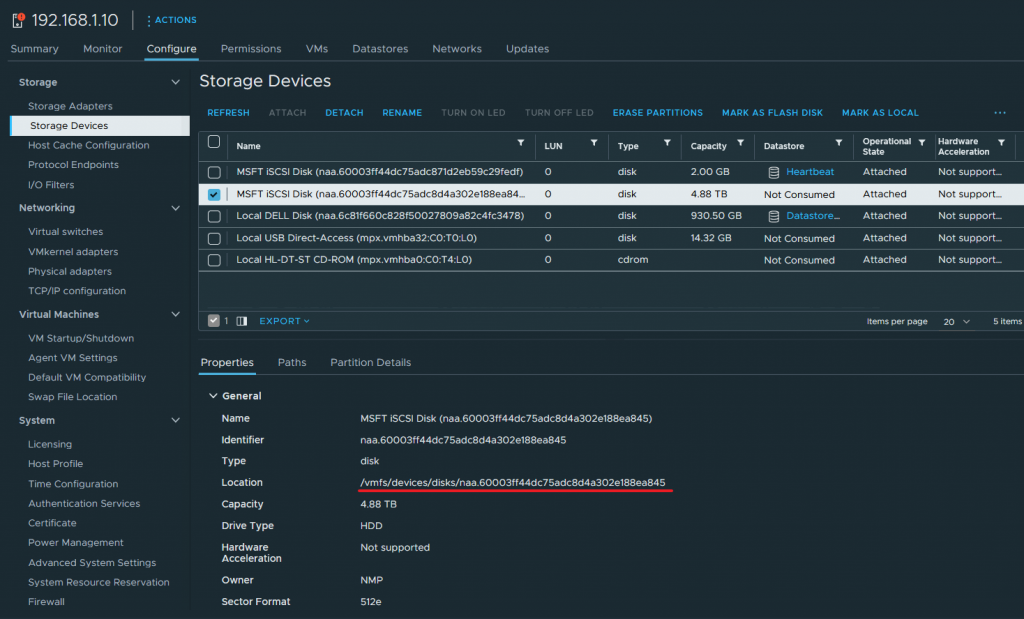
Step 3: Attempt to Re-Mount the Deleted Datastore
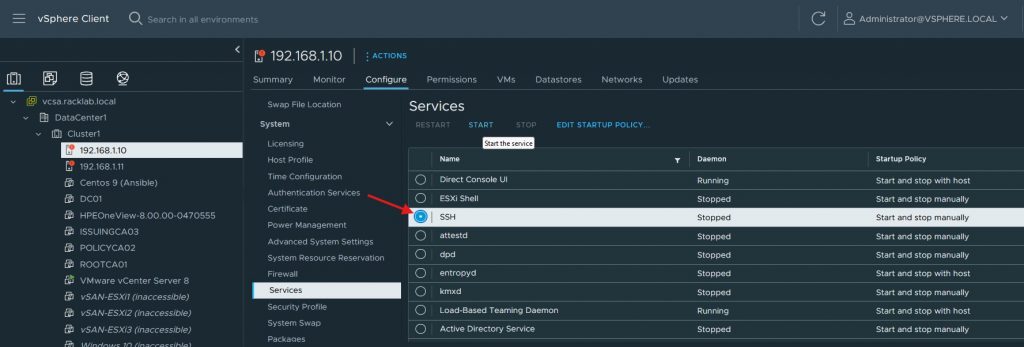
First of all, enable SSH service on the ESXi host and connect to it using putty or any other SSH client.
Once connected, let’s get some info about the partition using the command.
partedUtil getptbl /vmfs/devices/disks/{Device identifier}
As it appears, the partition format is gpt. We will use this information later.
Next we can use the following script to display a summary of all partitions available on the ESXi host and find the first block of the deleted VMFS partition:
offset="128 2048"; for dev in `esxcfg-scsidevs -l | grep "Console Device:" | awk {'print $3'}`; do disk=$dev; echo $disk; partedUtil getptbl $disk; { for i in `echo $offset`; do echo "Checking offset found at $i:"; hexdump -n4 -s $((0x100000+(512*$i))) $disk; hexdump -n4 -s $((0x1300000+(512*$i))) $disk; hexdump -C -n 128 -s $((0x130001d + (512*$i))) $disk; done; } | grep -B 1 -A 5 d00d; echo "---------------------"; done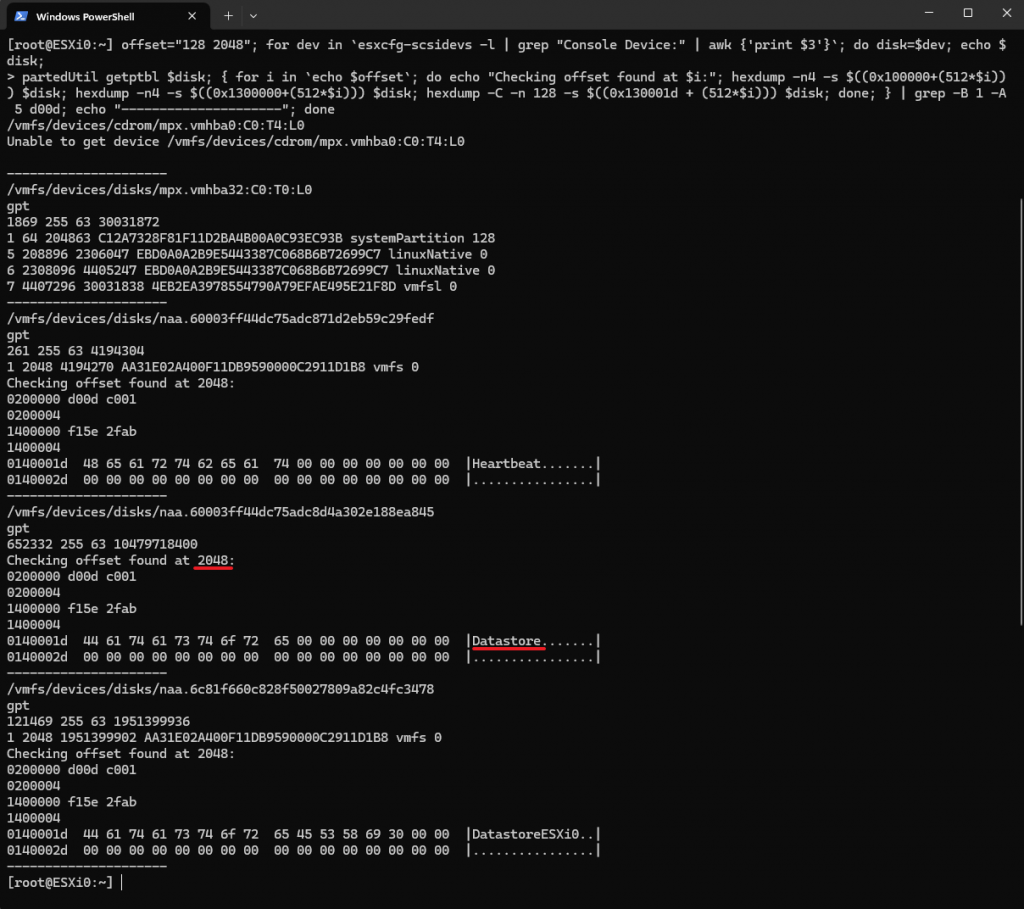
From the above output, we found out that the deleted partition has the name Datastore and the first block of the partition is 2048. We will use this number later.
After this, we have to get the last block of the VMFS partition using the command.
partedUtil getUsableSectors /vmfs/devices/disks/{Device identifier}
As we see, this is 10479718366.
Now we set a label for the partition table.
partedUtil mklabel /vmfs/devices/disks/{Device identifier}
Next we display the partition table GUIDs and get the one for vmfs.
partedUtil showGuids
Now we’ll create the partition table using all the information that we gathered.
- LUN ID — naa.60003ff44dc75adc8d4a302e188ea845
- Start Block – 2048
- End Block – 10479718366
- GPT GUID – AA31E02A400F11DB9590000C2911D1B8
partedUtil setptbl /vmfs/devices/disks/{Device identifier} gpt "1 {start block in VMFS partition} {end block in VMFS partition} {Partition GUID} 0"
Now we can run the vmkfstool command to mount the deleted Datastore, and then rescan all the storage devices.
vmkfstools -V
esxcli storage core adapter rescan --all
Step 4: Check if Datastore was recovered
Go to the vSphere client and check if the deleted VMFS datastore appears again.
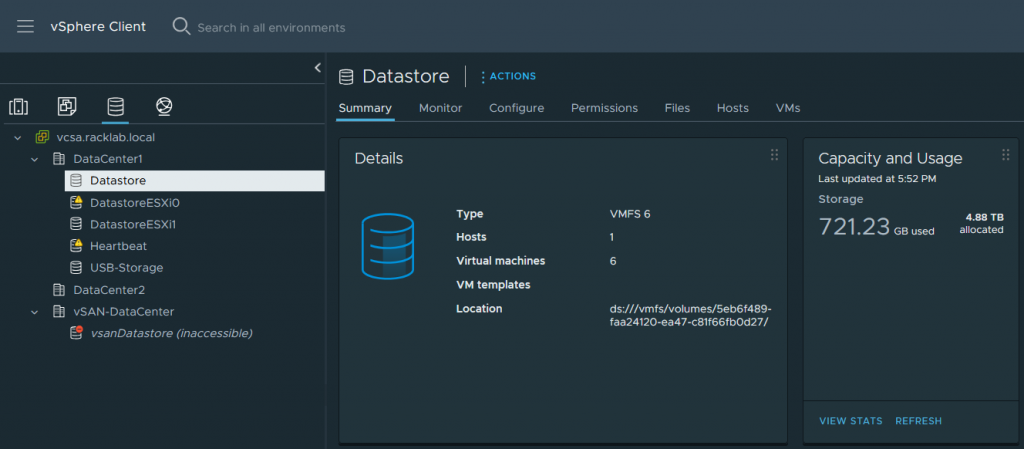
We can also see on the Storage Devices of the host that the Datastore is now available and all the files are in place.
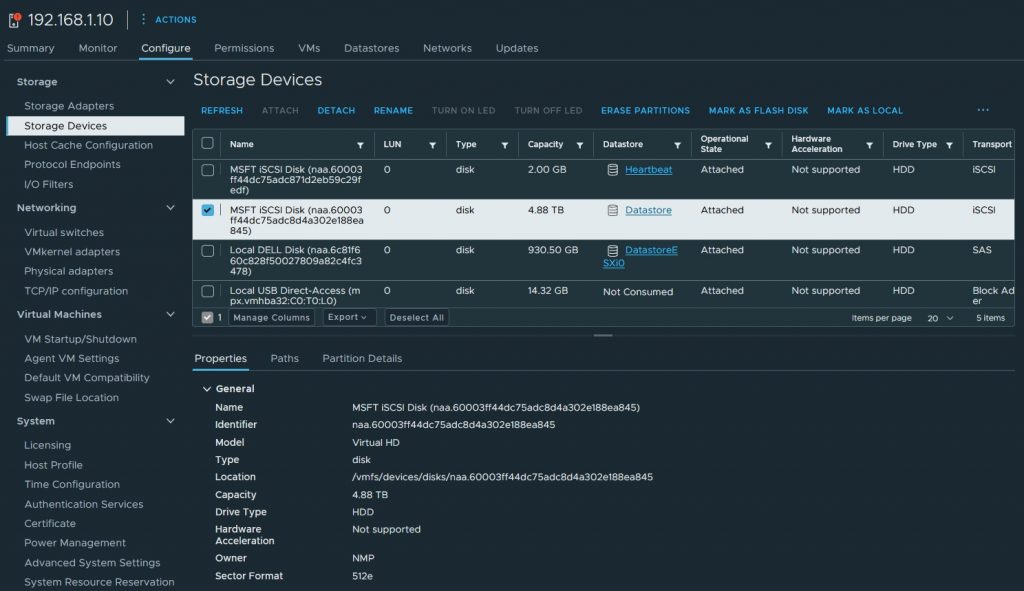

However it seems that Datastore is only available for first host ESXi0, the second host ESXi1 cannot access it.


We will mount the Datastore on the second host and it will be available also for it.
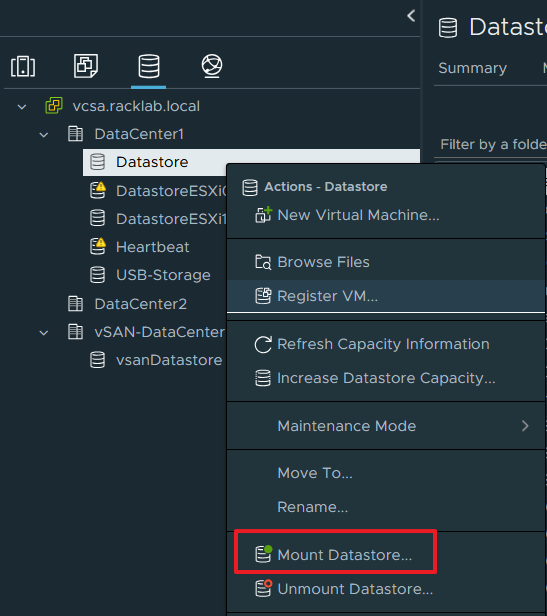
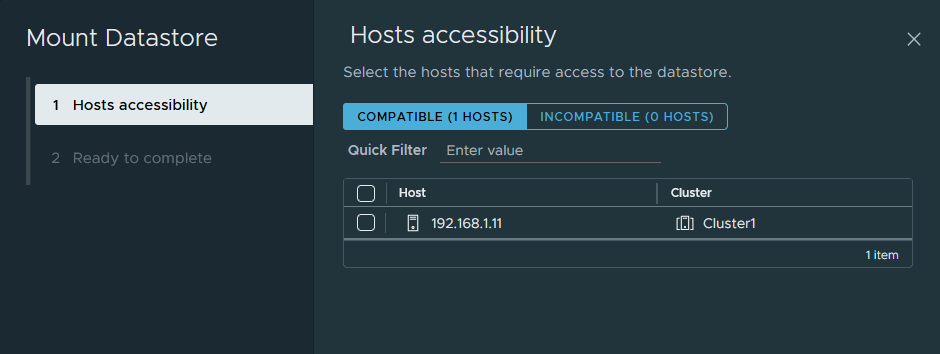
Now the Datastore is connected to both hosts, the files are available and everything is working as expected.
Conclusion
Restoring a deleted VMware ESXi datastore is a multi-step process, but with the right tools and preparation, it’s possible to recover lost data. Whether through rescanning storage, re-mounting the datastore, or restoring from backups, understanding your environment and acting quickly is key to minimizing downtime. Always maintain a strong backup policy to ensure rapid recovery from incidents like this in the future.

I was able to recover a datastore on my ESXi 6, you’re a life saver!
I just wanted to say THANK YOU! so much for this! I’m not a fan of the new ESXi gui (coming from old school 6x) and I totally screwed up and deleted my datastore somehow in 8… well.. i found this.. and step by step it save me!
Thanks!
Very clear and usefull article. It helped us with an accidentally deleted datastore that had to be detached. Thank you very much!
a 20tb datastore has been deleted, and steps from your post saved my life..
thank you